
1.Download Quicktime if you haven’t already.
2. Restart your Sony Vegas.
3. You should now see “Quicktime 7 (.mov) in your Render Settings. To access your Rendering Settings, you can click File > Render As.
![]()
4. Click on any of the options and press “Customize Template” and adjust your template to follow these settings. You can then rename your template to whichever name you want (I named it Transparent [Final]) and save the template.
![]()
![]()
![]()
![]()
5. Go back to your timeline and isolate the track you want to render. You can press the S (solo) or ! (in previous versions) button to isolate it.
![]()

6. Render using the Quicktime 7 (.mov) Template you just created above.
7. Drag the newly rendered file onto your timeline. You should see that it has a black “background”.

To get rid of it, we: Right-click the file > Properties > Media
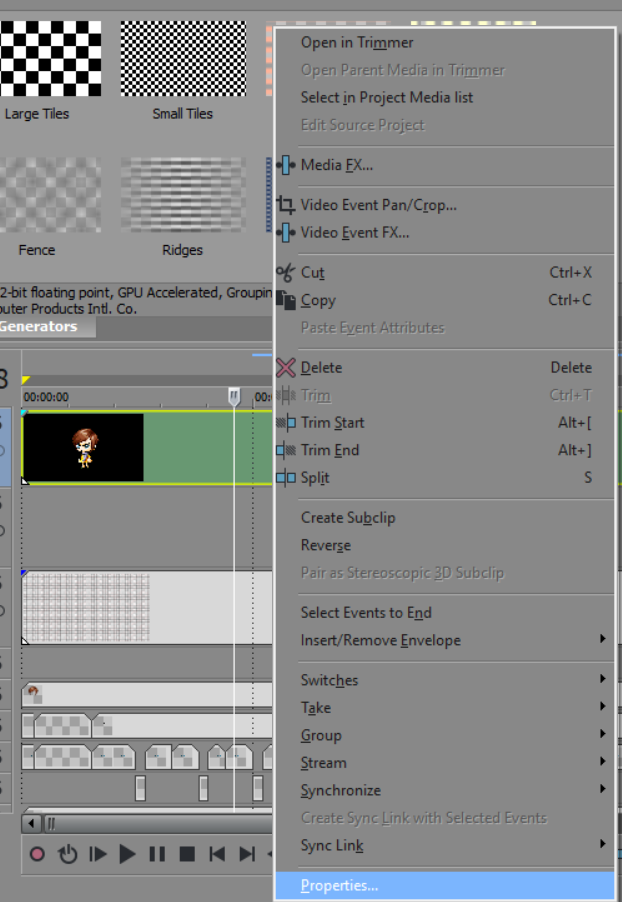
Go to Alpha Channel > Straight (unmatted) and press “ok”.

8. Your video file should now be transparent!

The reason why we sometimes want to render with a transparent background is that it saves space (eg. 9 tracks vs. 1 track) and it is easier to apply transitions and effects onto the layer. Instead of applying it 9 times, we can just apply it once.